A couple of months ago I found the perfect tutorial for making your own wedding bouquets. The instructions seemed simple enough, so I made the decision that I would DIY all the bouquets for my upcoming wedding. I wanted to do a trial run, just to make sure this would be a task simple enough to do the night before the wedding. (I'm imagining me and all the girls having a big slumber party, sipping on champagne and ya know, assembling flowers. This is normal, right?!)
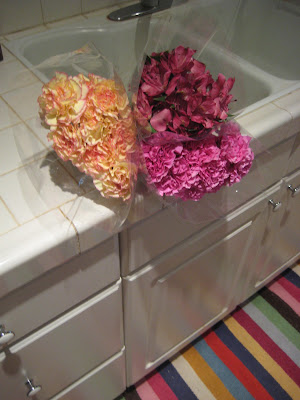
I bought $10 worth of flowers from the grocery store consisting of yellow and pink carnations and pink alstromeria. (When I make the actual bouquets for my wedding they will be different colors.) I brought them home and left the flowers in the kitchen sink until I was ready to go to work!
The first step was removing all of the access foliage off of the stems. Then I trimmed them down to about 14 inches.
I started with three center flowers and using floral tape, wrapped the stems starting at about an inch below the bloom, wrapping all the way down leaving approximately 5 inches of stem exposed at the bottom. I'd place two or three more stems in the bunch in my hand, and wrap again with the floral tape. Once all the flowers were placed I wrapped it one more time with the floral tape, just to make the bouquet was as solid and sturdy as possible. I cut a strip of burlap fabric that was about two feet long and 2 inches wide (instead of using ribbon like most bouquets) and wrapped the base of it to conceal the floral tape. I secured the burlap with a couple of floral pins and voilà!
After completing the bouquet I realized the stems could be a little shorter, but other than that I think it turned out fabulously!!! It took me about 45 minutes to make, I was a little slow going in the beginning but picked up speed and confidence as I got going. (I think it should take about 2 hours to make 4 bouquets the night before the wedding.) Total cost, including the floral tape, floral pins with pearl heads and flowers, I spent around $15 to make this bouquet. I let it sit in a vase of water for several days, and by the fourth day it started to wilt, so I am super confident that making them the night before they will still look fresh the next day.
Since I was a bad blogger and didn't (couldn't) take pictures of the entire process (my hands were a little tied!) you can view the awesome tutorial I followed here.
skip to main |
skip to sidebar


Blog Archive
-
▼
2011
(203)
-
▼
September
(15)
- Craving Color. . .
- Party Time!
- Room of the Day & Giveaway Winner
- Wedding Wednesday: DIY Bouquet!
- Library Lights
- Project Update: Jordyn's Bedroom
- Wedding Wednesday: The Invites!
- Room of the day
- Giveaway from Mod Clay
- Revamped and Restyled Bookcase
- Bookcase Styling
- House Envy
- Missoni for Target: Home
- Room of the day & New Sponsors!
- This week. . .
-
▼
September
(15)


Followers
Search!
JPM Design Idea Gallery
- Accessorising (8)
- Appliances and Fixtures (3)
- Architectural Elements (3)
- Around My House (45)
- Art and Wall Decor (33)
- Bargain Hunting (7)
- Bathrooms (17)
- Beach Weddings (4)
- Bedding (2)
- Bedrooms (38)
- Before and Afters (4)
- California (13)
- Children's Spaces (16)
- Closets (2)
- Color (28)
- Curb Appeal (1)
- Current Projects (8)
- DIY Weddings (20)
- Decorating Tips (5)
- Design Styles (3)
- Dining Rooms (16)
- Event Styling (11)
- Fabric (7)
- Flooring (2)
- Flowers (5)
- Foyers (7)
- Furniture (22)
- Gardening (4)
- Giveaways (11)
- Guest Posts (12)
- Happenings (14)
- Hardware (3)
- Home Decor Products (57)
- Home Renovation (7)
- House Tours (6)
- How To's and DIY Projects (24)
- Inspiring Designers (45)
- Inspiring Interiors (166)
- Internet Design Consulting (5)
- JPM Design Portfolio (38)
- JPM Design Services (17)
- Kitchens (21)
- Laundry Utility and Work Spaces (1)
- Lighting (14)
- Living Rooms (37)
- Look for Less (12)
- Marketing (1)
- Offices (7)
- Organizing (2)
- Our Wedding (25)
- Paint (12)
- Patios and Outdoor Spaces (16)
- Pillows (11)
- Real Estate (2)
- Rugs (9)
- Seasonal and Holiday Decorating (28)
- Small Spaces (1)
- Thrifting and Vintage Finds (4)
- Tile (3)
- Tools for Designers (1)
- Trends (15)
- Upholstery (2)
- Wallpaper (2)
- Wedding Inspirations (44)
- Window Coverings (5)
- wedding bouquets (7)
JPM Design's Top 10 Posts
Home Decor Resouces
- Accent Furniture Direct
- Anthropologie
- Art.com
- Ballard Designs
- Carrington Court Direct
- CB2
- Coffee Tables Galore
- Container Store
- Crate & Barrel
- Custom Sofa Design
- Dash & Albert
- Design Within Reach
- FCL Style
- Flor
- HSN
- Ikea
- IVG Stores
- Jayson Home & Garden
- JC Penny
- Jonathan Adler
- Overstock
- Pier 1
- Pillows & Throws
- Pottery Barn
- Restoration Hardware
- Room & Board
- Target
- Tonic Home
- Walmart
- West Elm
- Wisteria
- World Market
- Z Gallerie


